Floor Joist Span Tables
to set your joists
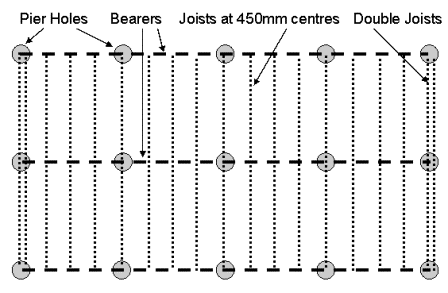
Floor joist span tables are used by kit home providers to design a floor system appropriate to your selected kit home. You have installed the bearers onto the piers, now lets lay the wooden floor joists and complete the second phase of the raised floor system.
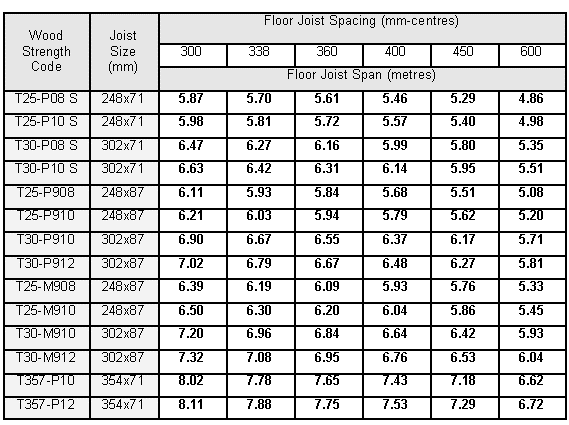
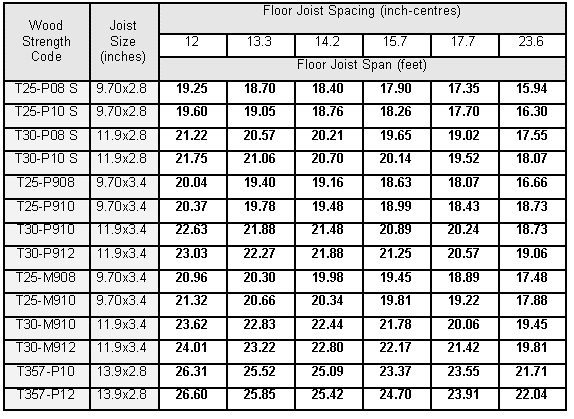
These joist span tables are subject to estimated load conditions, joist dimensions, span computations, deflection, bending and compression. Also subject to resistance to moisture through damp proofing, drainage and ground preparation.
Metric Floor Joist Span Table
Imperial Floor Joist Span Table
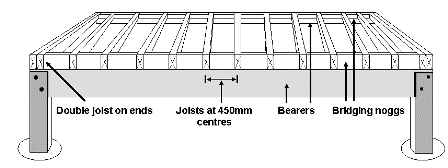
Standard wooden floor joist span table specs on kit home floor systems utilise 450mm (18") centres and double laminated joists at either end. Most joist fixing set ups are square set directly on the bearers with skew nailing and triplegrips. Other setups can utilise joist hangers which are installed against the inside wall of the bearer and reduce the height of the floor system.
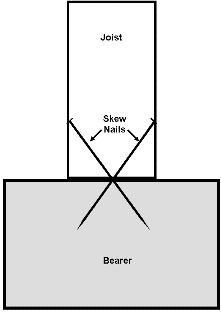
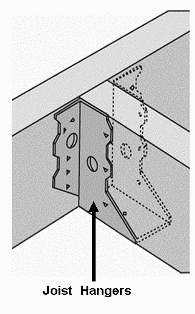
Place all joists 'bow up', if they have a bow in them. Set your double end joists first then map out 450mm centres (18") for your floor joist spacinggs, from one end to the other. You may have a 500 or 600mm space at the end where a extra joist must be installed to maintain 450mm or less spacing. Now sight the top of each beam and plane off any bows until they fall level, use a long straight edge to complete this task. This will ensure a true and straight floor and prevent squeaks as well.
Joists over 3 metres (3.2yds) require floor joist bridging nogs between 3m and 4.2m on the span as well as on the ends. Once the nogins are skew nailed in, triplegrips are installed on every second joist (see your own specs) to firmly lock in the floor system ready for sheet flooring installation.
The next step is to install your sheet flooring.
My DIY Flooring page sets out particle board flooring tips and tricks to complete the raised floor system.
Go back to Setting Out Plans
Go to Kit Home Basics home page
