Bathroom Tile Floor Patterns
Checking over these tile floor patterns will give inspiration for your kit home small bathroom design. Bathroom tile design ideas can come from all sorts of places, so check out the tile mags and go to the tile shops as well.
I also have a Bathroom Layouts page to help arrange your planned bathroom. Before you lay the tiles you need to apply a layer of Wet Sealing to building standards and of course a good measure to approximate tile needs.
Take a quick look at my Bathroom Tiling, Shower Building and Shower Tiling pages to get you going with the project.
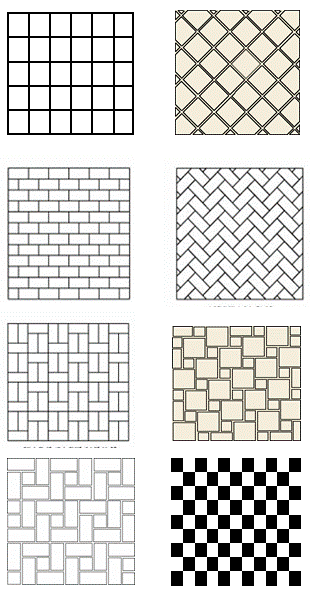
Tile floor patterns examples
Straight Course
A standard of bathroom tile floor patterns is to run square tiles with the lines running vertically and horizontally.
Diagonal Course or Diamond Pattern
Grout lines run on a 45-degree diagonal. Lots of careful diagonal cutting required
Brick Pattern
Tiles
are staggered, in a brick like pattern. Either square or rectangular
tiles. Regular measurements need to be taken to keep the pattern true
Herringbone
Rectangular tiles set on a horizontal zig-zag pattern with each one at a right angle to the previous one.
Basketweave
Use
rectangular tiles with a length that is two or three times the height.
Install two or three stacked horizontally adjacent to two or three
vertically
Ribbon pattern
A row of rectangular tiles is alternated with equal width square tiles. Can be done in a stacked or brick pattern
Windmill or Pinwheel Pattern
Surround a square tile with four rectangular tiles, each overlapping the end of the other and repeat.
Checkerboard pattern
Contrasting coloured tiles are alternated like a checkers game board. Can be laid as a diagonal course.
Tiling a bathroom
After determining your tile floor patterns, the first step in tiling a bathroom is determining where to start. Some tilers will recommend standing at the doorway to the bathroom and choosing the longest wall, snapping a chalk line at right-angles to it and working back towards the door (see graphic below). This can work quite well and can look great, as long as you don't end up with a very narrow tile line at the doorway.
Others will find the dead centre of the floor, that's wall to wall, snapping a right-angle line from that point and working away from the centre. This will ensure that equal tiles are layed at each end and sides. Both methods have their benefits so lay some dummy tile setups and make a choice. Be careful with out-of-square walls which will more than likely be from internal frames rather than load bearing walls.
How to cut ceramic tile
Installing ceramic floor tiles involves scoring and snapping the tile to finish up to the wall, or around obstacles. It can be done manually, but nobody does that, now that tile cutters are available.
Mark the tile with a dark pencil, lay the tile on the cutter, lift the lever to place the diamond wheel on the tile mark, draw the wheel down the length of the tile twice, now push down on the lever to snap the tile. Practice on old tiles first so you get the knack. Odd cuts will require the use of a rotary cutter or manual cutters. Keep offcuts for around drains, pipes, corners and unseen areas such as under vanities.
Tiling a bathroom: laying tiles
Learning how to install ceramic tiles starts with glue, that is, mixing glue. Unless your floor tile installation is a small job, get bulk glue ready to mix with water so you can mix the quantities you want and it doesn't cost the earth. Follow the mixing instructions and only mix what you will use for 30 minute
The application of tile glue can happen two ways: on the floor or on the tile.
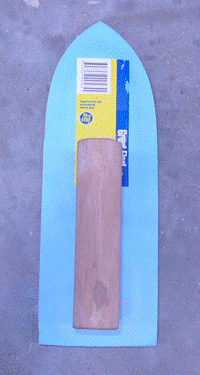
I use the tile method, but many like to put an even spread of glue over two rows and lay the tiles on the glued up floor. I find my guide lines get covered and I loose my way. The glue spreaders have serrations to allow a standard build level of glue on each bathroom tile. Spread it evenly and scrape off the edges so the glue does not settle between the tiles when layed.
Place (or drop) the tile and push gently to square it up. Place spacers between tiles to keep them square and straight. Stand up and look back along the edges frequently. Work back towards the door, using the guides all the way and making small adjustments for tile variations where necessary.
Tiling a bathroom can be very rewarding, and as long as you take your time, plan well ahead and keep checking your lines, installing ceramic floor tiles in your kit home will add value, function and visual appeal. The next step is installing tile grout.

Grout tools and supplies
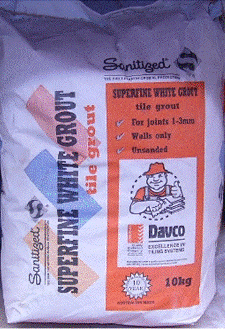
- Grout
- Mixing bucket
- 2 tile sponges
- 3 buckets of water
- Grout float
- Silicon sealer
- Tile Sealer
How to grout ceramic tile
Mixing grout
Add a portion of grout to a container and add water slowly. Using a spatula or mixer, fold and mix until the mixture resembles mashed potato or whipped cream: the grout shouldn't droop or fall off the spatula. If if does droop you have added too much water, so just add more grout. You can't really go wrong with this part.

Applying grout
Now we learn how to grout. Using a grout float, collect a portion of grout and start spreading it over the tiles in a 'fan' action, making sure you fill the gaps using diagonal swipes. Float off as much excess as possible and move it to the next section.
Leave it for 10 minutes to go off then using a damp sponge, wipe all excess away being careful not to add water to the applied grout. Clean and squeeze off grout in the water bucket. When the water fills with grout use another bucket. Let it dry for 24 hours then clean off and polish the tiles with a clean rag. Allow the tile adhesive to set for at least 24 hours before walking on the new floor.
Tile grout sealer
To retain the colour of the grout it is essential to seal it. Give the tiles a good 48 hours to completely dry. Mix the sealer if required and apply as directed to the grout with an applicator. You will be glad you did this step as light coloured tile grout absorbs dark stains very easily and loses its good looks quickly.
The next step is to waterproof the bathroom so go to my Wet Seal page for a guide or return to Bathroom Layouts . I also have a kitchen tile splashback page here. Or go back to the Kit Home Basics home page
 Shower Base Install Shower Base Install | |||
 Tiling Bathrooms Tiling Bathrooms |


