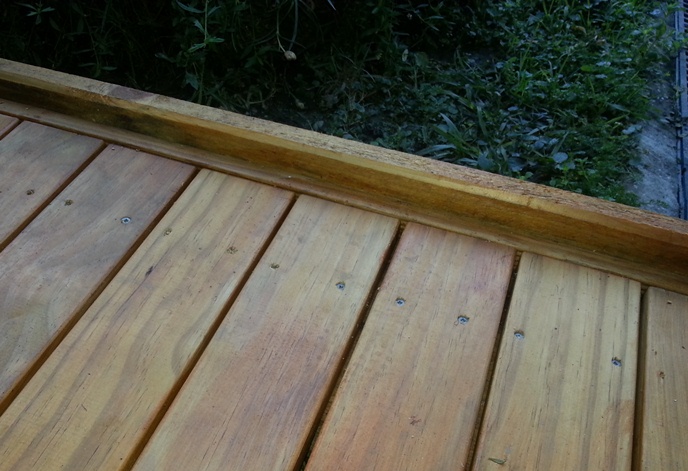
Cool Deck Design
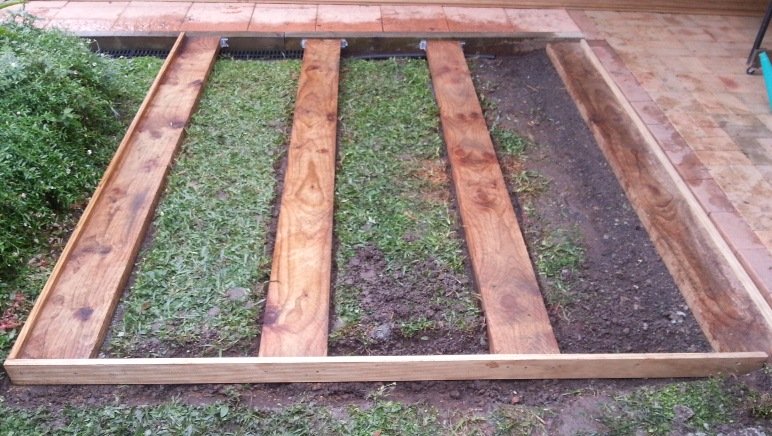
When creating this cool deck design for our new MSpa inflatable spa, I found that H4 treated sleepers were a viable foundation, when laid out flat. H4 meant they were CCA treated and could be used 'in-ground'. Obviously the ground surface was relatively level to start with, but a little spade work was all it needed to clear the grass under the sleepers. Consider a gravel layer under the sleepers for longevity.
This ground level deck design was very easy and the deck materials minimal. H4 2.4 metre treated sleepers x 4, and about 60 lineal metres of decking plank were required.
Also some galvanised fastening screws of various length and girth to tie it together. You may need a higher skirt to keep the water off as well, but make sure it is H4 treated wood, suitable for a ground level deck. Give consideration to drainage around and or under the structure making sure water can move around and away.
Ground level deck design
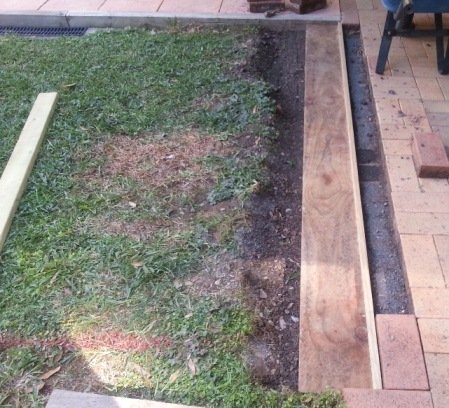
The patio house paving needed cutting away and the pavers were rearranged for the deck to butt up neatly. The first sleeper level was crucial and took the most time to settle and level against the pavers. The far outside sleeper was next and a long straightedge and level was used to get the two sleepers perfectly aligned.
I evened up the diagonals to get the setup exactly square. I did some
work on drainage, making sure water could flow through the deck and
away from the foundation sleepers at the far end, using channels and slotted ag pipe.
I then settled in the two inside sleepers to create a very efficient foundation. It will never sink because of the high amount of surface area it sits on, and the weight of the spa would be over all 4 sleepers as well. I made sure to poison the grass before I continued.
Next step in this deck design was the construction of a decking skirt and surround. The skirt makes a neat edge for the decking and helps to finish it. Using galvanised screws I fastened onto and around the sleeper ends. This may have to happen before you settle the sleeper, depending on access.
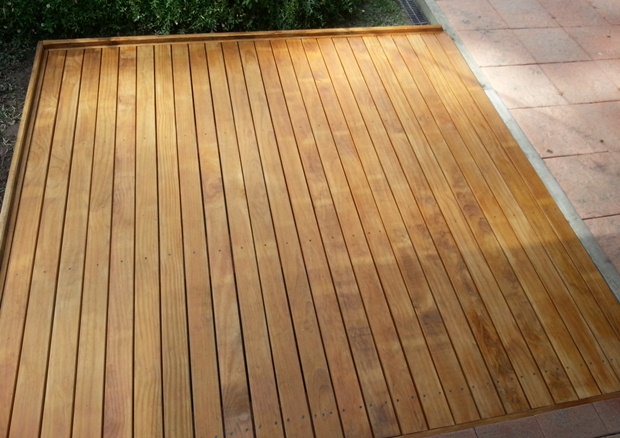
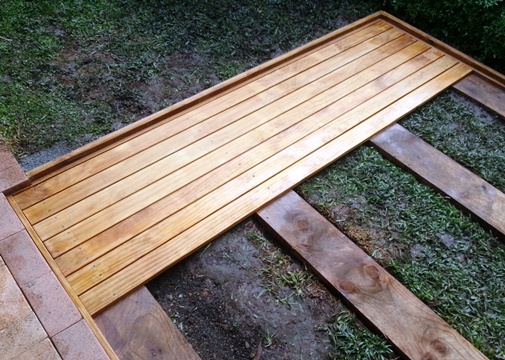
Lastly, this deck design required treated decking. But before I laid them I gave them a liberal coat of sealant protection especially on the ends. I used a 4mm screw each side to keep a regular gap and worked my way up the sleepers. I measured to the end every 5 deck planks to make sure I was going straight. When I reached the end few, slight adjustments to the gaps got it to end well.
A couple of coats of deck stain / sealant made this cool deck a masterpiece. I made this ground level deck to place my inflatable spa on. It worked a treat so go to M Spa Review to see how it came together.
Go back to DIY Projects or return to Kithomebasics home page
Comment on this project...
Share your comment here.
What Other Visitors Have Said
Click below to see contributions from other visitors to this page...
No drainage base material? 


No sand? No gravel or crushed rock? The wood frame will start to sink and distort after a few rain storms.
Deck builder 


Seems the sleepers are resting in the soil. What is the moisture content of that particular area as the wood will begain to rot and or the screws will …
need ideas to replace deck that is covered with plywood and the carpet 


My customer has a deck that the plywood under the carpet is rotted. It is a second story deck and am looking for a product to replace plywood. Support …
This will Rot. 


You left grass under it which will let weeds grow between your planks. The sleepers are in the dirt with no drainage, These will rot in no time. You will …
holding up Not rated yet
How is the wooden deck holding up. I am looking to do an install of this idea. Wondering if the ground has moved on your at all and if grass has grown …
Sleepers Exposed to Earth Not rated yet
This is a very interesting approach and I really like the fact that the surface of the deck is so low.
I never considered this before as we always build …
Great ground level deck design Not rated yet
That looks great and is something I've been thinking about doing. What type of wood are the sleepers? And what size are they? They look larger than rail …
